
Please scroll down
or Click HERE
to see
my 3 Girl JAM DT Post
Seeing Stars with 3 Girl JAM and Teresa Collins
***I AM SO EXCITED***
VOTING WILL BE OPEN
from 10/07/12 until 10/11/12
AT 11:59 p.m. CST
from 10/07/12 until 10/11/12
AT 11:59 p.m. CST
(The slight change in plans to begin voting was made in order to give everyone
time to link up their projects first)
Come One, Come All
time to link up their projects first)
Come One, Come All
and
show your love
to ALL of the Talented Participants
during the

Back in August,
announced
the 1st ever, Pink Cricut
Master Crafter Challenge
and
IT ALL STARTS TODAY!
IT ALL STARTS TODAY!
To read more about the idea behind the challenge
visit my previous post HERE
where I shared how it all started and
get a peek at all of the Wonderful Sponsors
for the event!
NOW, time to share my
Master Crafter Challenge Project!
I decided to go ALL OUT
and create an entire
Party Decor Set!
I was thrilled with how many of the
Secret Box items I was able to incorporate
into the different pieces
of the set!
On top of that, I used a lot of left over
scraps and tons of Negative Space "scraps"
from several of my Cricut Cuts.
**I will share underneath the pics,
the Secret Box Items that were used!
If you are interested in learning more about
the specific details on how I created
each piece, JUST ASK!!!
:o)
 This is the entire Party Decor Set
 Left Side View
 Middle View
The font used for WISH on the Banner and
Muslin Bag were cut from the Jasmine Cricut Cartridge.
For the banner, I cut the letters at 3".
For the Muslin bag, I cut them at 1 1/2" and added
a layer of glossy accents (and let dry)
before adhering them to the bag.
 Right Side View
The 3D Stars were cut at 5" from Tablescapes - Spring and Summer Cricut Cartridge.
The food and drink signs were created with the
negative space from the Banner top layers.
I adhered the small pieces to coordinating card stock, then
covered it entirely with a light coat of Mod Podge.
Once it dried, I was able to hand write the food names on the signs.
I then created a table tent from a 4"x12" piece of cream card stock
to hold the signs upright.
This is a handmade "Mixed Media" Jewelry Stand
(made from cardboard and scraps),
a Handmade Necklace
(created from one metal charm, two hand punches, card stock,
beads, and Glossy Accents),
and a Wish Bag.
 I played around with some handmade Glimmer Mists, Smooch Spritz, and Glossy Accents
to create the color wash effect and lettering on the cute little bag.
I also used my Pink By Design stamp -
the sentiment "sweet"
in multiple places on these both of these pieces.
My thought was that the necklace could be
presented in this bag as a Gift!
For these two projects in the Party Set
I was able to use
ALL of the Secret Box items!
The papers for the mixed media piece
were all scraps left over from cutting with my Scissor Mouse, hand punches,
and a leftover star which was cut at 5" using my
Tablescapes - Spring and Summer Cricut Cartridge.
 These Pillow Boxes were created using the
Scissor Mouse
 I wanted to have a fun place for
all the Party Guests to Sign In!
I used
was an actual left over negative space from the
top layers of the banner you see below.
I also used my corner round in a few spots!
 I really adore how this Banner turned out!!!
The 4 Letter Panels were created
using the DCWV Rockstar Mat Stack.
I used the Pretty Pennants Cricut Cartridge for all panels and spaces seen here.
The Panels were cut from Banner 2 and Layer (Sign) at 6".
I also used some Core'dinations Golden Pearl card stock.
The spaces were cut from Banner 4 and Layer (Hndstoth) at 2"
using Cream card stock and Core'dinations Scarlet Pearl card stock.
 Another angle of the Pillow Boxes...
this is the first time I ever created
Pillow Boxes, and I really LOVE making them!
visit my previous post HERE
where I shared how it all started and
get a peek at all of the Wonderful Sponsors
for the event!
NOW, time to share my
Master Crafter Challenge Project!
I decided to go ALL OUT
and create an entire
Party Decor Set!
I was thrilled with how many of the
Secret Box items I was able to incorporate
into the different pieces
of the set!
On top of that, I used a lot of left over
scraps and tons of Negative Space "scraps"
from several of my Cricut Cuts.
**I will share underneath the pics,
the Secret Box Items that were used!
If you are interested in learning more about
the specific details on how I created
each piece, JUST ASK!!!
:o)


The font used for WISH on the Banner and
Muslin Bag were cut from the Jasmine Cricut Cartridge.
For the banner, I cut the letters at 3".
For the Muslin bag, I cut them at 1 1/2" and added
a layer of glossy accents (and let dry)
before adhering them to the bag.

The 3D Stars were cut at 5" from Tablescapes - Spring and Summer Cricut Cartridge.
The food and drink signs were created with the
negative space from the Banner top layers.
I adhered the small pieces to coordinating card stock, then
covered it entirely with a light coat of Mod Podge.
Once it dried, I was able to hand write the food names on the signs.
I then created a table tent from a 4"x12" piece of cream card stock
to hold the signs upright.
This is a handmade "Mixed Media" Jewelry Stand
(made from cardboard and scraps),
a Handmade Necklace
(created from one metal charm, two hand punches, card stock,
beads, and Glossy Accents),
and a Wish Bag.

to create the color wash effect and lettering on the cute little bag.
I also used my Pink By Design stamp -
the sentiment "sweet"
in multiple places on these both of these pieces.
My thought was that the necklace could be
presented in this bag as a Gift!
For these two projects in the Party Set
I was able to use
ALL of the Secret Box items!
The papers for the mixed media piece
were all scraps left over from cutting with my Scissor Mouse, hand punches,
and a leftover star which was cut at 5" using my
Tablescapes - Spring and Summer Cricut Cartridge.

Scissor Mouse
DCWV Rockstar mat stack
and
Lime Green Rhinestones.
The pillow boxes were cut at 5" from
Tablescapes - Spring and Summer Cricut Cartridge
Lime Green Rhinestones.
The pillow boxes were cut at 5" from
Tablescapes - Spring and Summer Cricut Cartridge

all the Party Guests to Sign In!
I used
Rhinestons
The gold tag with the sentiment "Guest List"was an actual left over negative space from the
top layers of the banner you see below.
I also used my corner round in a few spots!

The 4 Letter Panels were created
using the DCWV Rockstar Mat Stack.
I used the Pretty Pennants Cricut Cartridge for all panels and spaces seen here.
The Panels were cut from Banner 2 and Layer (Sign) at 6".
I also used some Core'dinations Golden Pearl card stock.
The spaces were cut from Banner 4 and Layer (Hndstoth) at 2"
using Cream card stock and Core'dinations Scarlet Pearl card stock.
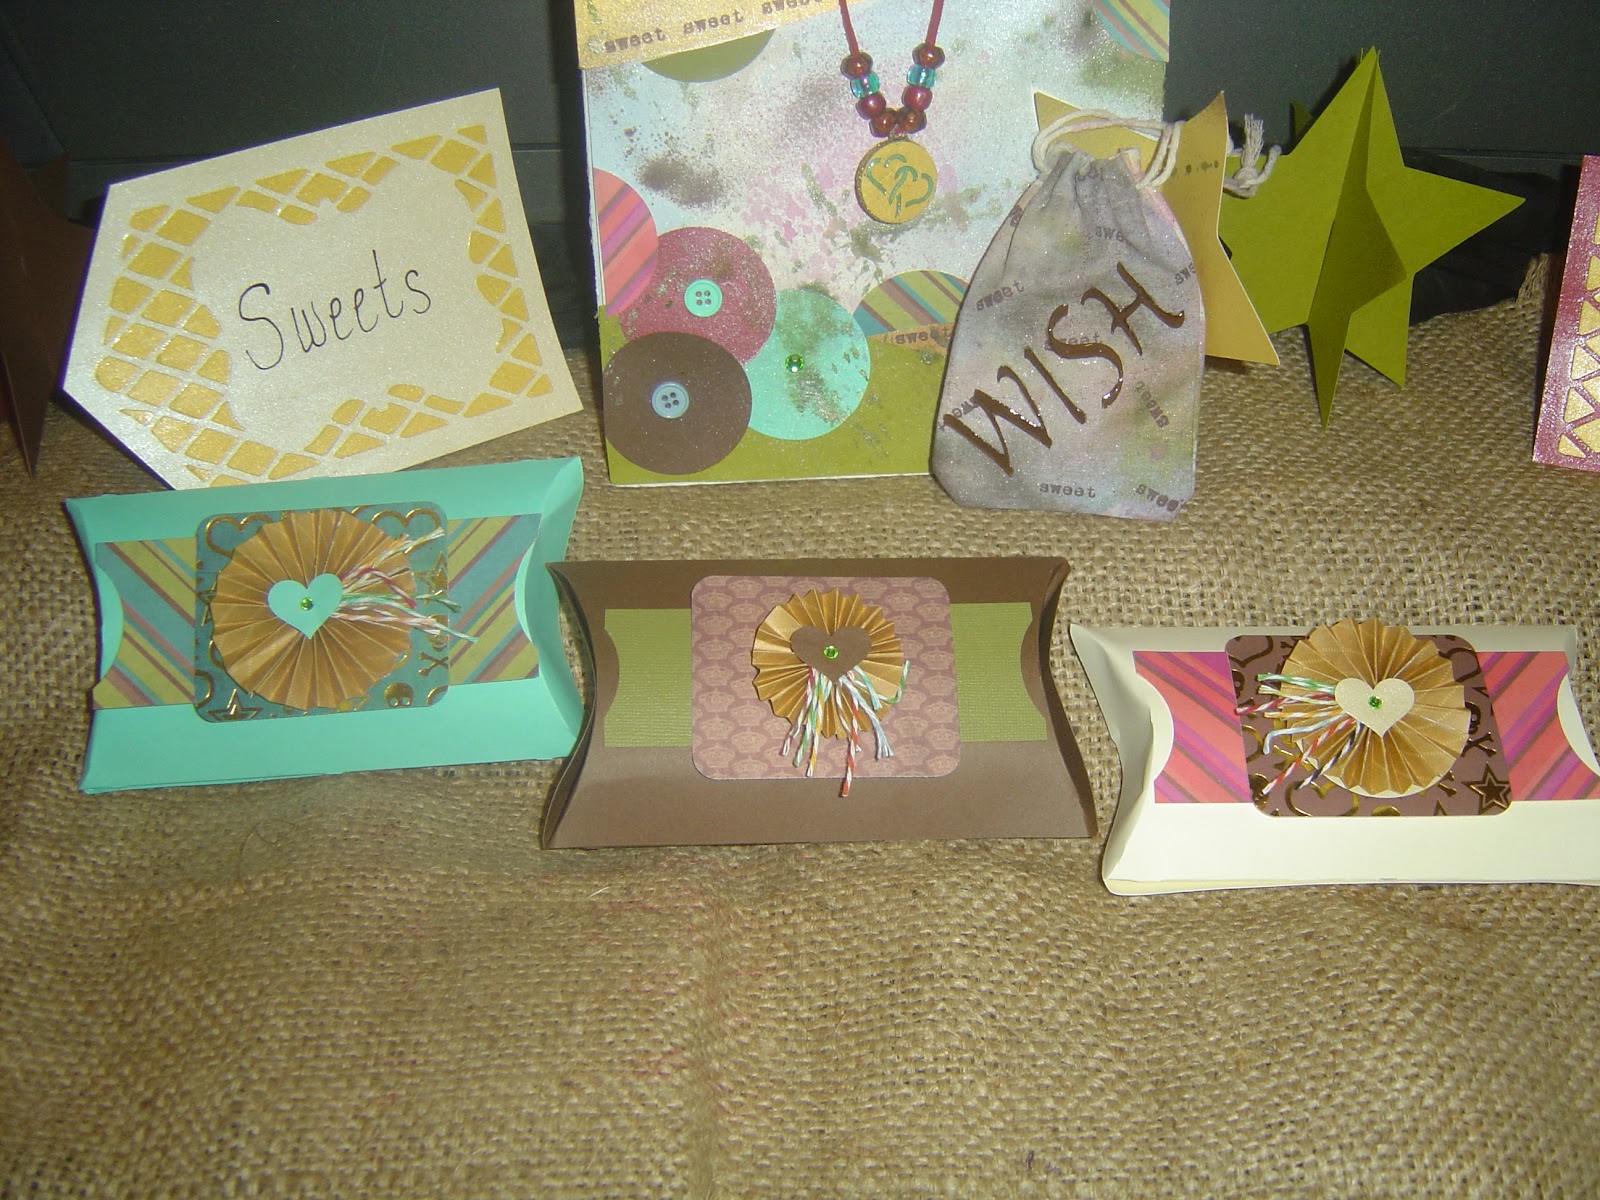
this is the first time I ever created
Pillow Boxes, and I really LOVE making them!
I used my corner rounder , heart punch and Scissor Mouse for
the paper layers and rosettes on these.
I also used over some leftover snippets of Twinery Twine.
the paper layers and rosettes on these.
I also used over some leftover snippets of Twinery Twine.
♫ ♪ ♫ ♪ ♫ LET'S GET THIS PARTY STARTED ♫ ♪ ♫ ♪ ♫
Head over
to the Pink Cricut Page
-HERE-
to check out all of the
PHENOMENAL
Projects that are being linked up.
Then be sure to head back over to
Pink Cricut - Master Crafter Challenge
on Sunday 10/7/12, to cast your votes!
PLEASE ~ Don't vote for me, JUST because
you heard about the contest here.
! VOTE FOR YOUR FAVORITE CRAFTY PROJECT!
That is the whole point of the Challenge isn't it?!?!
Voting ends October 11th at 12:02 am CST.
HOPE TO
SEE YOU
ALL THERE!!!
SEE YOU
ALL THERE!!!
Remember
to
Keep
Crafting
:O)
Jessica


