Showing posts with label Glimpz of Memories. Show all posts

Saturday, April 19

INTRODUCING: Crafty Kit Club with an Altered Journal: Steampunk themed

I am so uber excited to share today's project.  
Literally, I am almost busting at the seams.....
<<<running to put comfy jammies on before I go any further>>>

When I started the NEW Pinque Peacock Venture, Crafty Kit Club, I had a feeling I was going to thoroughly enjoy creating samples for fans and friends to oogle over.  The Design Team is just as excited to play with the Monthly Kits, too.  

I didn't anticipate how much fun the first kit was going to be to play with though!!!  Yes, I know, you are probably thinking, "Wow!  Doesn't take much to get Jessica in a good mood".  You would be right!!!  Things tend to get a little hectic around the homestead and crafting time for personal enjoyment has become scarce.  

My days are filled with Mom Taxi trips to and from the schools for the 4 kids who are school-age (K, 1st, 4th, and 12th).  The Bright Side?  We live close to the school.  The Down Side?  We live less than a mile from the school which leaves us ineligible to allow the kids to ride the bus.   Four separate start and end times for each grade means lots of trips to and from.  I am hopeful that when our youngest is in 1st grade, which is still 2 years away, some extra time will be freed up for me to do more.  But for now, when I get some extra time to go to my craft room and get messy, I am excited!  And, the finished project is always a delightful reminder of the time I used wisely!

So, what about this kit, right?
The April Kit is an Altered Journal/Notebook Kit.  

It is available in two styles for you to select from.  
The first style is a Girly/Bling/Shabby kit with lots of sparkle and bling, and papers and cardstock in shades of pinks, blacks, and whites.  

The second style is a Masculine/Steampunk style kit, with lots of bronze, brown, copper, and gold tones accented with some black and kraft cardstock.

There are some extras that you get to select to make your kit more personalized to your design taste as well.  


If you senses are intrigued and you would like to play with one of the April Kits, be sure to SWING OVER to the Crafty Kit Club {CLICK HERE} and order one today!  They are super reasonable in price and there is a flat shipping charge on all the Monthly Kits.  You can select to order Month to Month, or get a discounted price on the kits for being a 2 month, 3 month, or more than 3 month subscriber!

NOW, ONTO THE FUN PART OF THIS POST!!!!  
Sorry to leave you in suspense....
AND get ready for some cool step by step instructions (lots and lots of pictures)

I worked with Kit B, the Steampunk styled kit for my project.  

I started out by first tracing the outside of the book onto the cardstock I was using for the covers.....

.....then moved on to measuring and cutting.

I used my corner punch to round them to fit the composition notebook edges.

I adhered the inner covers (kraft card stock) first and let the book rest overnight to be certain the pages wouldn't stick together from the Mod Podge.
psssssttt.....The brayer tool by Mod Podge is really neat to have and worth the small cost in my opinion!

I opted to select my additional sheets (kit extras I mentioned earlier) from the Prima Engraver stack since there were a lot of clocks and a few map images at my disposal.

I adhered the back cover just as I did with the inner covers.....using Mod Podge and the brayer to smooth out any bubbles.  Before applying the front cover though, I decided to do some stamping and embossing first.  Here I used the map image from the Unity Stamp set called Travel Notes.  I used a gold metallic embossing powder to bring more metallic shine to the book.  I love how it looks against the Core'dinations Black Pearl card stock, don't you?

I moved on to my 6x6 squares of the Graphic45/Core Timeless squares.  

The clocks on the paper are raised and a nice slight bit of sanding brings them to life.

Now for GETTING MESSY & SOME DISTRESSING ACTION!!!

I painted the cardboard arrow from the kit with some Crackle Paint - Antiqued Bronze.

It was a bit too shiny, so I dulled it down by adding some TH Embossing Powder - Antique Linen and zapping it with my heat gun.

Much better now!

I tore the gray square to fit in the lower corner and upper corner of the front cover.  
(I also used the corner punch for the top piece to again, match the composition book)

I then grabbed my sponge dabber box and inked it up with some Tim Holtz Distress Ink - black soot.....


then Dew Drop in a Copper.....

then Dew Drop in Gold.....

And this is what they look like all mingled together against the Journal ....

During the whole process, I changed my mind about a dozen times when it came to placement of the pieces and embellishments.  But, that is the norm with me when designing.  Do you do that with your projects?

I stamped a few of the clock images from the Unity Stamp set called "the TIME is NOW" and embossed it with a white embossing powder and then just a dash of some TH Distress Powder-Vintage Photo.  

It was time to go ahead and adhere the cover to the book.  Again using my Mod Podge and brayer!  <<< I really love that thing....lol.

The stamping created a connection in the middle of the journal that joined the two corner pieces together.
(I ultimately opted to ink the top corner piece in the same way as I described the way I did the bottom corner up above in this post)

I had in mind that I would use the sentiment "Take Note" from the For the Record stamp set and decided to stamp it directly onto one of the clocks on my cream colored 6x6 square (Timeless Collection).  I just fussy cut the "half-clock" out for my sentiment "tag"
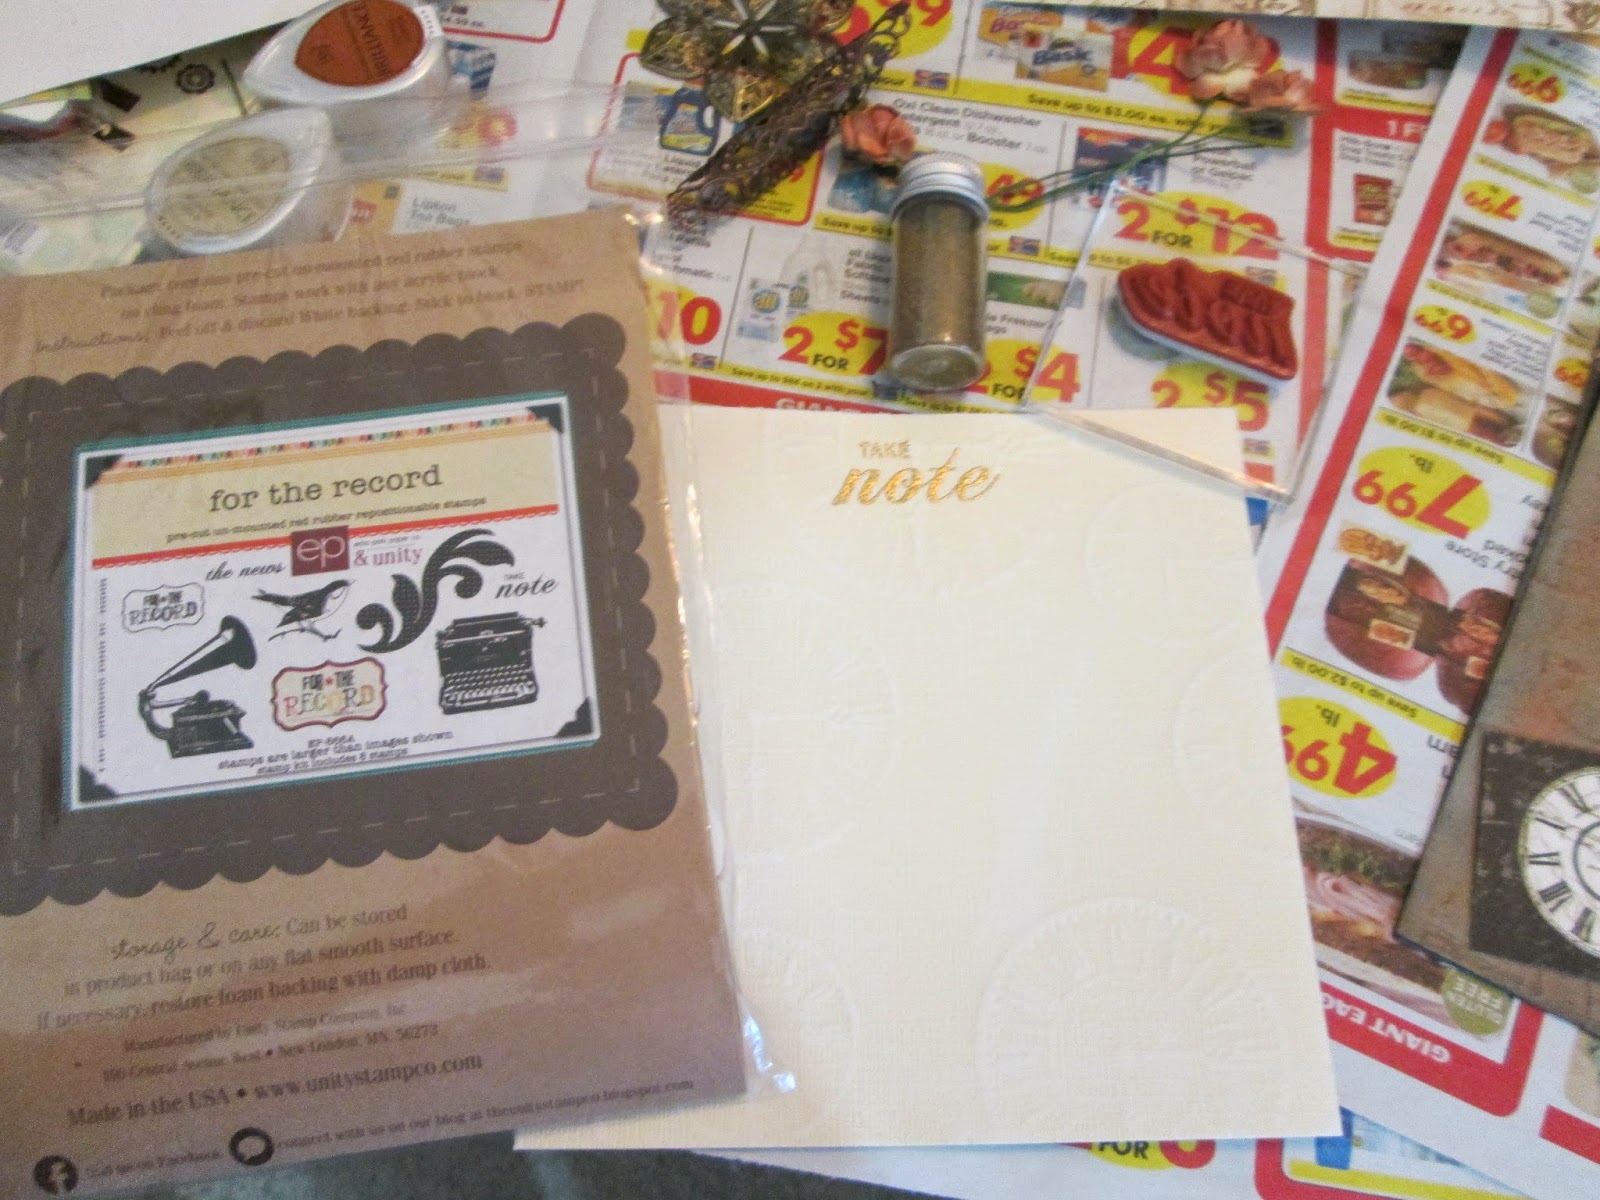
To play more with my fun crackle paints, I first lightly sanded my chipboard square from the kit (to hold the paint well) and then

I painted a coat of Tarnished Brass over it and left it to dry.  Once it was dry, I went around the edge with the Copper Dew Drop.

I fussy cut a few clocks from the Prima sheets I selected and used my corner punch on them.

Now it was time to lay it all out until I could get it "Baby Bear" aka Just Right!

Here is where I changed my mind a few dozen times....
I will spare you the agony of showing pictures of all the options I tried before committing to one design!

I did commit once I placed the gears down and used some Glossy Accents to hold them in place.  No turning back now!!!

For a finishing touch, earlier in the process, I had bent the metal oval embellishment from the kit to fit the bind of the journal .  These are from Miriam's Crafting Supplies and she has a wide selection to choose from.  You will see these, along with other Partner products, in the kits often!

and added some 3 Girl JAM (another Product Partner) Tuxedo Black Crinkle Ribbon to the bind (tied in a bow) as well as at the bottom (pleated).

....and this is what I came up with as the Finished Design!!!!

Here is a close up of the sentiment (by the way, I also dabbed some Dew Drop Copper to the clock after cutting it out)

A side view to show off the gorgeous hat pin I created with the supplies that were in the Kit as well!  Buttons and Paper Roses too!  The Paper Roses are from another Product Partner, Adele at Glimpz of Memories!

So there you have it folks!  I am happy to read your comments on my tutorial and how well you like the Kits.  And, again, here is the link to the Crafty Kit Club if you want to get one for yourself!
Crafty Kit Club {CLICK HERE

Remember to 
Keep Crafting, 
Because 
♫ CRAFTING ♫ 
♫ ROCKS ♫ 
\m/-_-\m/ 
:O) Jessica

Monday, February 24

Happy Birthday to my Twin - Jennifer!

!!! HAPPY MONDAY !!!
Blends and 3 Girl JAM-mers

I am excited to get to share my project with all of our lovely followers at the 3 Girl JAM Blog today!

Today is not only my birthday, but also my sweet Twin, Jennifer's birthday, too.
I made her a Gift using the wonderful 3 Girl JAM Crinkle Ribbon.

Since the February Challenge Theme with 3 Girl JAM is "THINGS I LOVE"
this was a perfect way for me to show how much I LOVE HER!!!!

Jennifer is my BEST FRIEND in the whole world.  She has been by my side from Day 1.   She is a wonderful support to me during some of the most difficult times, and an amazing encouragement to me on the Good Days too!  My life would not be the same without her!!!
HAPPY BIRTHDAY SISSY-FER!

Here is the finished wall hanging.

I used two fabulous colors of 3 Girl JAM Crinkle Ribbon on the gift.  First I used
Aqua Splash 

so that it could be hung on a wall, cabinet, or anywhere her heart desires.  I left a few "frilly" ends to give it a bit more character.

I then used

to offset the light color of the Aqua Splash.

I tied small pieces of the same colors to the wood shape (from Unity Stamp Co.).  The wood shape coordinates perfectly with the stamp set I used for the sentiments on this project.  The Unity Stamp Co. set is called  ...birthday jubilee by artista, Lisa Arana.

The sentiment was stamped first with embossing ink and heat embossed using Tim Holtz  vintage photo Distress Powder directly onto the wood.

I also used the "happy birthday" pennant sentiment from the same set over on the left side of the wall art.

The image of the two Besties is by the wonderful Sherri Baldy and is called "Kickin Back"
This is only the 2nd time I have used my Spectrum Noir markers, but ----WOW do I love them!!!
I have a lot of learning to do with them, but they are sooooo super fun!

You can purchase your own markers at the Pinque Peacock Discount Hut at very AFFORDABLE prices!
(some IN STOCK and others are available for PREORDER)

Other products I used include:
American Crafts brand Pigment Ink (Lavender and Powder)
Paper Roses from Adele Garcia (at Glimpz of Memories group on FB)
Pearls Cardstock by Core'dinations (golden pearl and pink baby pearl) ---also available at 
Scotch ATG gun and tape
and
Staples

JOIN THE FUN CHALLENGE - THERE IS STILL PLENTY OF TIME!!!!
The 3 Girl JAM Challenge for the month of February is
"THINGS I LOVE"

3 Girl JAM Challenges


You'll always find LOADS of inspiration at the 3 Girl JAM Challenge Blog!
Stop over for wonderful ideas from the Design Team and all those who are linking up!

We'd love for you to Link your Projects to JOIN THE FUN and for a chance to WIN a Gift Certificate to Shop at 3 Girl JAM!!!!

For more 3 Girl JAM Product and Project Ideas, be sure to check out the 3 Girl JAM Pinterest Boards!

ONCE AGAIN......
~*~*~ AWESOME DISCOUNT ALERT ~*~*~
Stop by 3 Girl JAM to shop around and place an order

for any of the amazing products that are
a MUST HAVE in your stash!

SAVE 10% OFF Your Order ---Just use the Discount Code JB10 during checkout!!!


Thanks for Stopping In Today


Remember 
to Keep 
Crafting, 
Because 
♫ CRAFTING ♫ 
♫ ROCKS ♫ 
\m/-_-\m/ 
:O) Jessica

Thursday, December 5

Card Making with FUN New Techniques - "Scrap Tag" & "Diamond Fold"

WELCOME TO THE SHAQUE
CRAFTY BLENDS

If you stopped in yesterday, you found out that I have been stepping outside of my comfort zone a wee bit and diving into some fun challenges.  These challenges are really getting the mojo to work some overtime.
I shared a Tri Shutter Fold Card yesterday and have 2 more cards to share with you today.

The first card is a New Technique to me called "Scrap Tag".  It is a great way to use up those small tidbits of scrap paper you have kept in your studios.  The technique was shared by a New Friend I met on Scrapbook Friends and More Crafts (a SUPER FUN group of Crafters on Facebook), Brandy Martin.  I couldn't wait to try it out.

I started by gathering all the scraps I had left over from my Altered Treasure Chest last week.  If you missed that post, check it out HERE.

I sorted them out by patterns and started folding away.  You simply make a quick loop from the strips and adhere the ends together.  Your strips can be skinny, chunky, short, or long.  There really is no wrong way to play with this technique.


One of my favorite things about this style, is the uniqueness of the dimension it gives to the card.  You can choose to fold the "loops flat" or leave them rounded and more puffy.  I opted for something right along the middle of the spectrum for mine.


I grabbed a Christmas Tree Die Cut that I also had laying about (I have to remember to see if I own this die because I want more of these....LOL).  The tree was cut from some Core'dinations card stock I have in Produce Greens.  


Does the sentiment HAPPY HOLIDAYS look familiar?  Well, I had mentioned those in the Altered Treasure Chest post as well. 


 I had cut all the Subway Word Out from a pattern paper, but decided not to use it on that particular project.  I knew it would come in handy soon, though!


I gave the tree a little extra "pizazz" and I embossed it with my Sizzix Swirls folder.


To finish off my card, I added some scraps to the inside and used my Spellbinders Postage Stamp die cuts for the sentiment tag.  The sentiment "Believe in the magic of Christmas" is from the Unity Stamp Co. Kit of the Mon (Aug 2012) called COLOR of the Seasons.  I inked it up using my Tim Holtz Barn Door (red) Distress Ink.


I really love how simple this technique was to play with.  I also enjoyed that I found justification in my "paper hoarding" since I had kept the pieces that were already "perfect size" for this style!


~*~
~*~*~
~*~*~*~*~
~*~*~*~*~*~*~*~
|_|

For my second card, I tried another new Fancy Fold.  This time, it was the Diamond Fold Technique.
And, I am so eager to try more of these now too!


I followed the steps in this wonderful Diamond Fold Tutorial on SCS.

As a self-claimed STACK-A-HOLIC, I was ecstatic to play with my newest DCWV 12x12 Stack, called the Playtime Stack.

It has wonderful images and patterns and 1/2 of the entire collection is Glitter embossed!  eeeeekkkk---SPARKLY!

Here are the sheets I used


and
here are several views of the finished card!

FRONT VIEW-FOLDED IN

The focal image/sentiment is a Unity Stamp Co. set called Birthday Jubilee by artist Joslyn Nielson
I heat embossed it with some Whispers embossing powder--Baby Blue.

I used some of my paper flowers that I ordered from the sweet Adele G. at Glimpz of Memories on Facebook.  I love twirling the wire stem around a skewer to give it the "vine" look sometimes.

FRONT VIEW - SLIGHTLY UNFOLDED

FRONT VIEW - FULLY OPENED

For the side panels (rectangles), I used by Spellbinders Persian Motif dies to cut a few medallions.  I simply sliced them down the center to fit within the panels and to layer a small onto a larger one for added affect.


INSIDE VIEW - FULL

Again, I adorned the sentiment square with some lovely paper flowers from Adele G. at Glimpz of Memories.  The triangles were cut from the the same sheets in the DCWV Stack - the Playtime and a few scraps I had left over from another project.

INSIDE VIEW - CLOSE UP OF SENTIMENT

I {LOVE} all the Birthday Sentiments in the Birthday Jubilee set by Unity!  


They really helped bring my cards to a great Grand Finale!

If you try either of these techniques, I would love to stop by and check out your creations!  Feel free to leave me a link to a post, facebook page, or any other site so I can visit you, too!


Remember 
to 
Keep Crafting, 
Because 
♫ CRAFTING ♫ 
♫ ROCKS ♫ 
\m/-_-\m/ 
:O) Jessica

Social Butterfly?

Charity Wings

100% Certified

100% Certified
BAD A$$ Facebook Fan Page

Bill of Rights

Photobucket

Thanks Deb

Recent Visitors