Showing posts with label Crafty Tips. Show all posts

Friday, February 1

3 Girl JAM Chalenge #11 - 3D Valentine's w/Ribbon

Are you ready for the New Challenge with 3 Girl JAM

Challenge #11 -
Theme: 3D Valentine's w/Ribbon
Date: Feb 1~ Feb 14th
Sponsor: StateLine Bag Company
Prize: 
25 Canvas Bags from StateLine Bags Co.
1 bundle of  3GJ ribbon,
and a Guest designer spot at 3GJ

Our Challenge Sponsor for this Challenge is

State Line Bags Co.
http://statelinebag.com/crafts/

If you haven't heard yet, 3 Girl JAM is now an official retailer of State Line Bags!  You can stock up on these wonderful Canvas Bags and Crinkle Ribbon all in one trip, now!!!

The Design Team has shared some fabulous projects with you today to help inspire you as you create your Valentine's Day Projects!!!  Be sure to stop over to the Challenge Blog to view all the scrumptious creations.
Then JOIN IN THE FUN!!!

I was inspired by our Beautiful Friend and Leader, Julie K of A Little Bit of Bling, and owner of 3  Girl JAM.  She shared her creation with all of our Design Team and I was absolutley in awe of her gorgeous techniques and end result on her State Line Bag.
 Isn't this truly Magnificent?
Way to Rock the Bag Julie....so thrilled over this beauty, that I had to share it!
THANKS FOR THE INSPIRATION!

Here is the 3D Valentine Project I created after being so inspired by Julie's Project above!

I tried to spritz my homemade pink glimmer mist onto my bag, but my spray bottle was not being very cooperative.  I unscrewed the cap and painted the mix on the canvas bag instead.  As it dried, I began creating my tags.  I inked up the edges with American Crafts - Rouge Red.  I then stamped the background puzzle image from the Unity Set, Love you to pieces, using Dew Drops - Starlite Silver. I pleated some Summer Sprinkles Crinkle Ribbon around the edge of my tag for a softened appeal.  I stamped the same image onto a second Kraft Tag and placed that on the back of the first using 3D foam squares.  I added a fussy cut puzzle piece (another stamp in the Unity Set) and a heart to my tag.  The paper I used for the puzzle piece is Amy Tangerine-Sketchbook.  Aren't those rainbow hearts just darling!  I put the heart on an Action Wobble for extra pizazz!
 The bag was then stamped with the same background puzzle image, but using my Ranger Embossing ink this time.  I sprinkled white embossing powder over the wet ink, then heat embossed.  I would suggest letting the heat gun be as far away as possible for this technique.  If you get to close, it will begin to discolor from the high heat.
 I added the sentiment, Love you to pieces, from the same Unity Set using TH Distress Ink, Black Soot.  I went over the sentiment on the bag with my black gel pen for added darkness.
To finish off my State Line Bag, I added Cherry Lipstick and more Summer Sprinkles Crinkle Ribbon to the drawstrings.
I did a little more stamping and embossing on the back of the bag because you can never have too much, right?  LOL!  I wanted to show you also that if you get your heat tool too close to the painted bag, it can discolor it a bit.  See the center of the bag that has a bit of an orange hue?  That was pink, not orange...he he he! 

Thanks EVER SO MUCH
lovely Blends and 3 Girl JAMmers
for stopping by today.

Remember to Keep Crafting, 
Because 
♫ CRAFTING ♫ ♫ ROCKS ♫ 
\m/-_-\m/ 
:O) Jessica

Thursday, September 6

Theme Day Thursday - FALL Foliage

Welcome To


Today's Theme
at My Cricut Craft Room
is
~~~~~Fall Foliage~~~~~

I was lucky enough to find an amazing deal on some
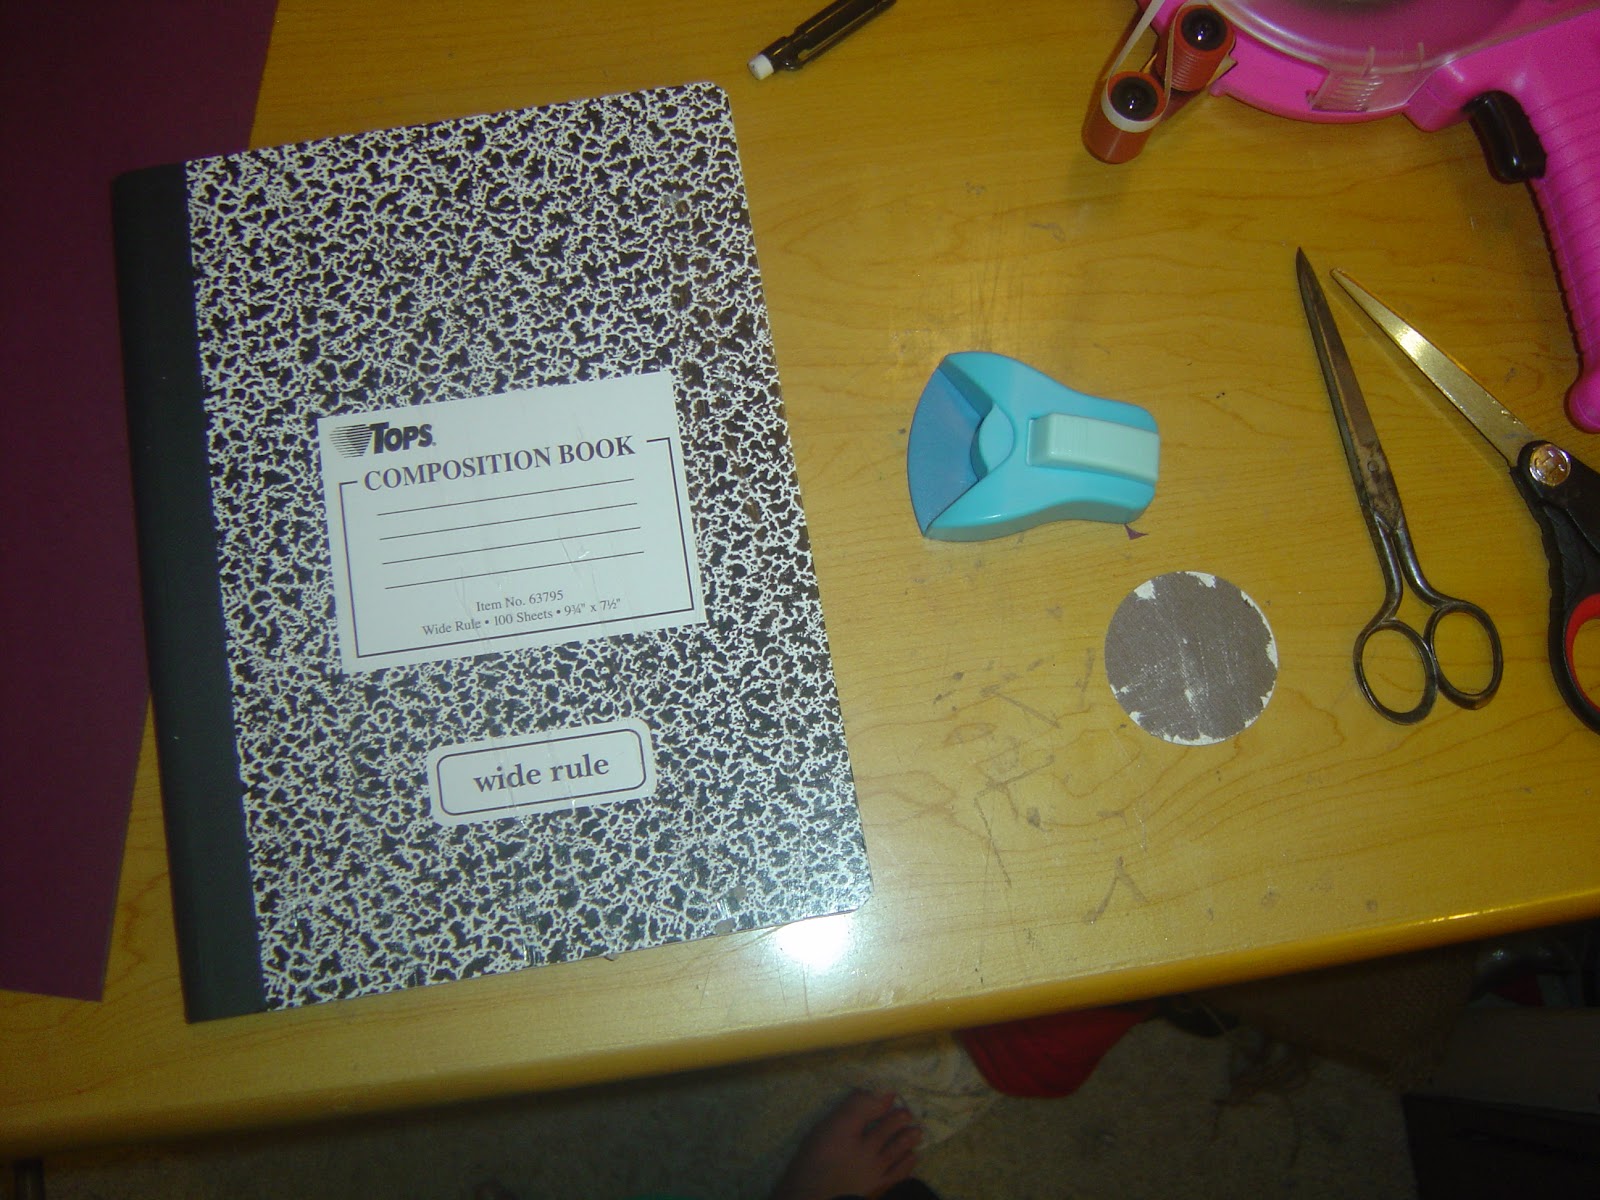
Composition Notebooks last week
at my local Best Buy
10 cents each!!!
Yep, I bought all they had in stock. . . 48 notebooks for $4.80 - SCORE!!!

I was so very eager to start
altering one.
I decided I would use this week's theme
at
My Cricut Craft Room
as my inspiration.
 
 I had an idea for the Title of my Idea Journal
instantly come to mind with the theme
of Fall Foliage, too. . .
sharing that later in the post!


I decided to start by perusing through
ALL of my scrap papers
and choosing out some fun
fall crispy colors to work with
for my Journal.

If you are anything like me, I was able to find
some pre-cut shapes
that were left overs
and some fun pattern papers, too.

I wanted to make a neat flower from a tutorial
that Heather Lynn shared with me last week.
She even gave me some pieces of fabric
to play with as I tried out the technique.
 Thanks Heather!

I took the strip of yellow fabric and adhered
some Frost King double sided adhesive
(this is the roll that comes with window winterizing kits at your
local hardware or DIY store).
I ran my heat gun along the strip before peeling the
paper backing off, for extra "stickiness"
then folded the fabric in half to bring
the two sides together.

 I then cut two strips at a little over 12" long.
(final dimensions 12.5" by 1")

The technique suggests you make small slits about
1/4" to 1/2" apart along the length
of your fabric.
 I prepared a 2" circle for the finished flower to
rest upon and got out some
other supplies I knew I would
be needing for this project.
I wanted to spruce up my fabric
with a little bit of
Olive Green Smooch Spritz first.
I then let that dry, while I began working on
the remainder of my project.

Once you are finished making your slits, and adding smooch if you desire,
 you can then roll the strip inwards to create the flower
and adhere it to you pre-cut circle base.
I placed a large Craft Glu Dot
in the center and pierced it with
the leaf brad you see above.

Before applying the flower, I wanted to create
a "grassy knoll" area on my journal.

The fibers you see here, are a fun
crafty score from Goodwill.
I simply added strips
of the Frost  King adhesive to the bottom portion
of the front of the book.
 I then twirled the fibers into small loops and
pressed down firmly until
the entire area was covered.
I applied my large flower using my glue gun.

I added a bit of the same Smooch Spritz
to some plain white card stock and hung that to dry as well.
The square was about 6 1/4" x 6 1/4" in dimension.
I grabbed a fun frame that I had kept in my scraps, that just happened
to be the same dimension.
The frame was a left over negative space scrap from a
Lacy Labels Cartridge Cut
for a previous project.
This was used as an overlay to my smooched white paper.
I was hoping to have a fun Fall Sky background when I was finished so I could
begin to add my Fall Foliage cuts.

 I used my Serenade Cartridge to cut the fun tree
at 4 1/2" in height.
The leaves were cut from Flower Shoppe Cartridge
at 2 1/2" each.
I sprayed them with some Smooch and inked
the edges with some TH Distress Ink - Vintage Photo.

The alpha stickers are by Webster's Pages and I added some
white jelly pen around each letter for
better  visibility.
 The rhinestone sunburst in the corner was smooched
and sat off to the side to dry
before applying behind the leaf.
I grabbed a bit of other fibers that
I got during the same trip to Goodwill, made a fun
pom pom and adhered this all to the journal
as an attached book marker.
For the inside of my Journal,
I added some yellow card stock and a few Fall stickers 
I  had in my stash.  I thought the fun
label sticker would be a great
place to write in
This Book Belongs To Jessica!

The green piece of card stock peeking out 
was also a left over scrap from a prior Lacy Labels Cricut cut.

I added 2 brown Making Memories eyelets to the 
front cover and back cover of the journal.
I then fed some Cappucino Twinery Twine
through and tied it in a bow.
It is nice to have a closure on your
book if you add elements that make it somewhat bulky
(like my bookmark you see below)

Here is the finished journal.
The title reads
"let the ideas fall"

Thank you so much for stopping by
today.  Be sure to head over to
My Cricut Craft Room
to see all of the other wonderful
projects my DT Sisters
have created.

 
Keep Crafting 
:O) 
Jessica

Friday, July 20

♪ Ustream Showcase: Artiste + HUGE, HUGE, HUGE Giveaways ♪


My Cricut Craft Room
 is
hosting a fantastic
Ustream 
Saturday, July 21, 2012
starting at 9 p.m. EST
(8pm - CST - - - 7pm MST - - - 6pm PST)
to highlight the
fabulous new
Artiste Cricut Cartridge
If you would like to order yours, it will be Available on August 1st.
You can place your PRE-ORDER
today
if you go visit Jackie, CTMH Consultant, HERE

There are going to be some awesome
tips and tutorials
to show you
this AMAZING
new Cartridge in Action
(6 hours of FUN)
 &
~~~ GIVEAWAYS, TOO ~~~
Join the Fun Ustream and
you COULD WIN
a Wild Card 2  or Tags, Bags, Boxes and More 2
Cricut Cartridge
during the broadcast!!!
Courtesy of Provo Craft
along with
some other fun prizes.

But, wait, there's more . . . .
Erica's Craft Room
is 
sponsoring a
HUGE, HUGE, HUGE Giveaway
$500 in Crafty Product
(can I get a Whoop Whoop?)
When you stop by, tell her 
Jessica S. @ Jessica's Craft Shaque
sent you over!!!

WHAT ARE YOU WAITING FOR....
HEAD OVER TO
MY CRICUT CRAFT ROOM
NOW TO ENTER!!!
 (Lot's of fun ways to enter between June 20 and July 29)

QUICK LINKS
Erica's Craft Room
My Cricut Craft Room (Blog)
My Cricut Craft Room (Giveaway Post)
Erica's Craft Room USTREAM Channel
Giveaway Event Page on FB

Remember to tell Erica
Jessica S. @ Jessica's Craft Shaque
sent you over!!! 
GOOD LUCK!!!
 &
Keep Crafting 
:O) 
Jessica

Wednesday, May 16

**Handmade Flower Tutorial** 3 Girl JAM, Unity, TCCB #4 and Chick Challenges

******************************************
My 400 follower celebration ends in a little over 48 hours . . .
Click HERE to join in the fun
and to try 
in winning
a Grand Prize, 2nd Place Prize, or 3rd Place Prize
******************************************

After completing a lot of layouts for the 
Spellbinders Paper Arts
contest
to benefit
Crops of Luv,

I decided to change it back up
and finish a card tonight.


I was inspired to use
Joan's Sketch

and to use the current theme for the 
 #4 Challenge ~ Butterflies and Handmade Flowers

 I chose a black and purple theme that
coordinated with my butterfly dp.

The scallop "banners" were cute using a cut from Lacy Labels.

Unity Stamps that I used include:
(for the center of my hand made flower/inside the bottle cap)

sentiment from {Ippity} set BE BRAVE...BRANCH OUT
inked on vellum and then heat embossed

and some foliage/berries from the{Ippity} set Where You Should Be
inked and heat embossed

For my HANDMADE FLOWER
I created it in several layers
 (for the bottle cap center)
1. cutting a 3/4" circle from Lacy Labels
2. inking it with a soft lilac Studio G ink
3. stamping the flower and embossing it with black powder
4. adding the small black pearl
5. spraying a mist of Perfect Pearls 
6. gluing the circle to a bottle cap
7. adding a bit of alcohol ink (peridot)

8. adhering the bottle cap to the white cirlce (1")
9. using my MS Scroll Lace corner punch to create the petals 

around the perimeter of the white circle


10. adhering those layers to a purple circle (2")
then to another white circle (2 1/4")
11. The outside "petals" were created by twisting
of the last white circle.

I hope you enjoy my creation!
Thanks for visiting 
The Shaque
.
.
.
Keep Crafting 
:O) 
Jessica

Tuesday, May 15

*** House of Hearts *** 3 Girl JAM DT Post

It is with great honor that I share
the project I completed for my 3 Girl JAM Post today.

I have created this Layout to send to a fabulous
organization called 
Please consider visiting their website to learn more about the
awesome journey that have taken in helping 
families preserve their memories
one page at a time.

I found out about Crops of Luv from Spellbinders Paper Arts
who is hosting a fantastic
contest in an effort to get a lot of scrapbook layouts 
sent to Crops of Luv.
Find the contest HERE

I am also honored to be on the 3GJ DT and to have
had the chance to use the fun 
Cherry Lipstick Pink Crinkle Ribbon from 3 Girl JAM
in my project today.


I created a small pocket behind the 4x6 mat for the tag to hide in :O)
The spider rose created on this Layout was created using the same 
technique mentioned on my layout

Products used on this layout:
Pink card stock base
4x6 mat dp
3x3 photo mats
Studio G glitter glue
Title created using scrapworks alphadotz
Twine on tag from doodlebug design, inc.
Tag for journaling: from Unity Stamp Co.
Stamps on Tag:
House stamp in upper corner:


Keep Crafting 
:O) 
Jessica

Friday, May 11

****Friends with Flair Friday****


Today I am sharing a layout I finished yesterday
AND 
a little inspiration help from the Outlawz - TT Bingo Challenge
I wanted to try for a full card, but opted to stop before I 
used "Too Much"
my row: Punches/Die Cuts; Design Paper; Distress Inks/Inks


I used card stock by Darice and Recollections,  
Quick Quotes Scrapbook Company Cherry Truffle dp, 
3 Girl JAM Crinkle Ribbon (Ice Blue, Cherry Lipstick, and Sunflower Yellow) for the spider roses and the Chevron Canvas Strip behind the title is also a product available at 3 Girl JAM . 

The large die cut shapes were cut using my Cricut Cartridge - Lacy Labels.

I used Black Archival Ink by Ranger on all the stamping.

These pictures were taken during our fun Girl's Trip to Akron, OH for the Adventures in Stamping show 
and during our visit to Erica's Room!!! 
So much fun!!! 
 I also want to add that I used the same technique from Becky Fleck of PageMaps that she featured at Scrapbook & Cards Today.
 
And of course I used Lots and Lots of stamps from Unity Stamp Company. 
Sun and circle words:  April 2012 {FOLLOW your own} KOM

Sentiment in lower left corner
  
Sweet Moment Journaling Box: Ippity set here and now


Keep Crafting 
:O) 
Jessica

Thursday, April 5

My new Unity Stamp Organizer - Turn Style

 Please be sure to stop by my Blog Candy Giveaway ~ HERE ~
Check out the New 3 Girl JAM Design Team ~ HERE ~
For the MITTMM #15 Post ~ HERE ~
and
If you haven't stopped by my BFF Teresa's Blog go ~ HERE ~

* * * * * * * * * * * * * * * * *

 I am feeling a bit better today, not as fatigued as I have been lately.  I was pleased to be able to craft a little.  My sweet guy arrived home early from work today.  I asked him if he would like to try to build me a spinning turn style for my Unity Stamps.  I saw someone use a jewelry stand for their collection of itty bitty stamps and this got me thinking about how I could store all of my goodies.  
He asked what I wanted and I told him the measurements that would work.

He came back inside after about 20 minutes and told me I couldn't peek.  I couldn't believe he was done already.  I know he is quite savvy when it comes to inventing wonderful ideas for things, but
I had no idea he was THIS GOOD . . . LOL!

Turns out, we had an old CD/DVD turn style in the garage that we were planning to throw out.  He simply cut some of the metal bars and shaved the ends down so that they weren't sharp enough to scratch or poke me.  And now I have a wonderful carousel to store all of my Unity Stamps . . . .
I LOVE IT!!!  
I bounced about the house for a while in excitement then started organizing them all.

Here is how it turned out . . .

It holds my KOM stamps (currently 6 kits)
 

My individual Ippity sets (currently 5 sets)

My individual Unity and Co Brand sets (currently 11 sets)
 
and all of my itty bitty stamps (currently at 22)

I am so excited to have all of my stamps moved from a rubber bin to this beautiful set up.  Now I can see all of the stamps I own at one glance.

Thank You Lance . . I LOVE YOU SOOOOO MUCH!

Keep Crafting 
:O) 
Jessica

Social Butterfly?

Charity Wings

100% Certified

100% Certified
BAD A$$ Facebook Fan Page

Bill of Rights

Photobucket

Thanks Deb

Recent Visitors